By Gus Koedding
•
April 7, 2025
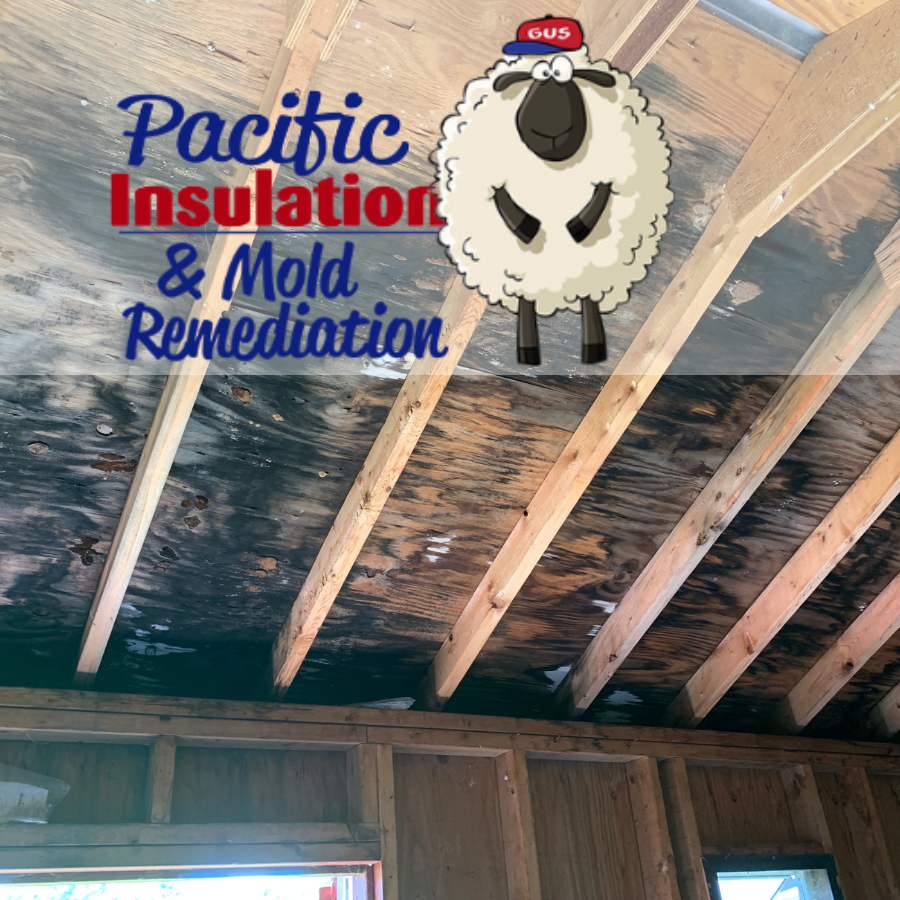
Understanding the dynamics of attic relative humidity is crucial for building contractors and HVAC technicians. It's not just about maintaining a comfortable indoor environment. The implications go beyond comfort. Attic humidity levels can significantly impact the integrity of a building and the efficiency of HVAC systems. High humidity in the attic can lead to mold growth, including hazardous black mold. This poses health risks to occupants and can damage the building structure. On the other hand, proper attic insulation plays a pivotal role in managing humidity levels. It helps maintain a stable temperature, reducing the potential for condensation and mold growth. This article aims to provide a comprehensive understanding of attic relative humidity. It will delve into the principles of thermal dynamics, the role of insulation, and practical strategies for humidity control. By the end, you'll be equipped with the knowledge to make informed decisions in your construction or HVAC projects, ensuring energy efficiency and occupant comfort. The Importance of Attic Relative Humidity Attic relative humidity is a crucial aspect of building health and efficiency. When humidity levels are high, the potential for mold development increases. Mold not only affects the aesthetic appeal of a home but also poses serious health risks. Efficient attic insulation contributes to managing humidity levels. By preventing temperature fluctuations, insulation minimizes the chances of condensation within the attic space. This helps to maintain the building’s structural integrity and prevents degradation over time. Moreover, understanding attic relative humidity can lead to significant cost savings. Proper management helps reduce the load on HVAC systems, leading to lower energy bills. Efficient systems can extend the lifespan of HVAC equipment, providing additional financial benefits. Contractors and HVAC technicians who grasp this concept can achieve better results in their projects. They can offer enhanced comfort to clients, ensuring satisfaction and repeat business. It's clear that maintaining appropriate attic humidity is a wise investment for any building professional. How Attic Humidity Affects Building Integrity Attic humidity plays a vital role in the longevity of a building. Excessive moisture can weaken crucial structural components. Over time, this leads to problems that may compromise the safety and stability of the structure. High attic humidity creates an ideal environment for mold growth. Mold can proliferate quickly, spreading throughout the attic and beyond. This not only damages materials but also undermines the building’s overall integrity. Inadequate control of humidity can cause insulation materials to become less effective. Moisture-logged insulation loses its thermal resistance, leading to increased energy consumption. This can result in higher heating and cooling costs for property owners. Moreover, excessive humidity can cause wood structures to warp or rot. This deterioration weakens beams and supports, posing a potential safety hazard. Regular monitoring and controlling of attic humidity levels are critical to prevent costly repairs. Mold Growth and Health Risks Mold growth is a common byproduct of excessive attic humidity. Mold loves damp, dark conditions, making attics a prime location for spores to thrive. Once established, mold can be tricky to remove. The presence of mold poses several health risks. Exposure can lead to respiratory problems, especially for individuals with allergies or asthma. Some molds, like black mold, can produce toxins that are particularly hazardous. Key health risks associated with mold include: Respiratory irritation and allergies Asthma attacks or other breathing difficulties Skin and eye irritation Controlling humidity can mitigate these health issues. Reducing moisture levels prevents mold from growing in the first place. Implementing effective humidity control strategies is crucial to maintaining a healthy indoor environment. Structural Damage and Insulation Deterioration Excessive humidity impacts both the structural components and insulation in attics. When wood absorbs too much moisture, it can begin to warp or rot. Rotting wood jeopardizes the structural integrity of a building, necessitating potentially expensive repairs. Insulation materials are also at risk. Moisture decreases insulation's effectiveness by reducing its R-value. Lower R-values mean more heat escapes during winter and enters in summer, leading to inefficient energy use. Key potential damages from high humidity include: Warped or rotted wood structures Damaged or ineffective insulation Increased energy consumption and costs Regular inspections can catch these issues early. Mitigating humidity problems prevents deterioration and extends the lifespan of building materials. Properly managing attic humidity is essential for the overall health and efficiency of any structure. Principles of Thermal Dynamics in Attic Spaces Understanding thermal dynamics is crucial for managing attic conditions. These principles dictate how heat moves within spaces. Knowing these can assist in selecting proper insulation and ventilation strategies. Heat transfer occurs in three ways: conduction, convection, and radiation. Each mode impacts how temperature and humidity levels are controlled. Grasping these concepts enables better decision-making for attic management. Proper insulation is vital in minimizing undesirable heat transfer. Insulation slows heat flow, maintaining stable temperatures. This results in a more energy-efficient home and a healthier attic environment. By utilizing knowledge of thermal dynamics, professionals can effectively manage attic climates. This reduces issues like excessive humidity and associated mold problems. It also extends the life of attic structures and insulation materials. Conduction, Convection, and Radiation Conduction involves heat transfer through solid materials. In attics, this occurs when heat passes through walls, floors, or roofs. Effective insulation reduces conduction by providing resistance to this heat flow. Convection is the process of heat transfer through fluids such as air. In attic spaces, convection affects how warm air rises and cool air sinks. Ventilation systems help control convection, maintaining more consistent temperatures. Radiation involves heat transfer through electromagnetic waves. Sunlight entering through the roof adds heat via radiation. Reflective barriers can minimize this effect, particularly during hotter months. Understanding these processes helps in selecting the best materials and ventilation techniques. Properly managing these heat transfer methods can significantly reduce energy expenses. It also prevents excessive attic humidity, promoting a healthier environment. The Role of Insulation Materials Insulation materials play a crucial role in managing attic temperatures and moisture. Different materials vary in their effectiveness and suitability. Choosing the right insulation can make a significant difference. Insulation works by reducing heat conduction and slowing down heat flow. This keeps indoor spaces warmer in winter and cooler in summer. A higher R-value indicates better insulation performance, enhancing energy efficiency. Key insulation materials include: Fiberglass : Known for its affordability and effectiveness in various climates. Cellulose : Made from recycled paper, provides good thermal and sound insulation. Foam Board : Offers high insulation value with moisture resistance. Spray Foam : Expands to fill gaps, providing excellent air sealing and insulation. Selecting the right insulation depends on factors like climate, budget, and specific attic conditions. It's vital to consider both thermal performance and moisture resistance. Proper insulation choice supports a balanced attic environment, optimizing comfort and energy use. Strategies for Controlling Attic Humidity Controlling attic humidity is crucial for maintaining a safe and efficient environment. High humidity can lead to mold growth and structural issues. Proper strategies can prevent these problems and ensure long-term attic health. Effective ventilation is one of the most straightforward solutions. It facilitates air exchange, removing excess moisture. Options range from passive vents to more advanced active systems that regulate airflow. Adding vapor barriers can help block moisture from rising into the attic. These barriers are typically installed during construction or major renovations. They are a crucial line of defense against humidity-related issues. Sealing air leaks is another vital strategy. Gaps in the attic floor or roof can let warm, moist air seep into the space. By sealing these gaps, you can significantly reduce humidity levels and related risks. Ventilation Solutions Ventilation plays a key role in managing attic humidity. It enables air circulation, preventing moisture buildup. Properly ventilated attics are less prone to mold growth and insulation deterioration. Different options exist depending on the attic’s design and local climate. Passive ventilation uses natural airflow, requiring no mechanical parts. It includes options like ridge vents and soffit vents that encourage air movement. For more robust control, active ventilation solutions can be used. These include mechanical systems like fans that forcefully remove warm, moist air. Active systems can be automated to maintain optimal conditions consistently. When selecting ventilation solutions, consider the following options: Ridge Vents : Allow warm air to escape naturally from the peak of the roof. Soffit Vents : Facilitate cool air entering beneath the roof eaves. Attic Fans : Actively draw out hot air, providing effective moisture control. Matching the right ventilation solution to your attic’s needs can greatly reduce humidity issues. This ensures structural integrity and improves the efficiency of HVAC systems. Vapor Barriers and Sealing Leaks Vapor barriers are essential for controlling attic humidity. They block moisture from permeating through the floors and walls. Implementing them correctly can protect against many humidity-related problems. Vapor barriers are often made of plastic or foil sheets. These materials are installed beneath the attic insulation. They effectively prevent moisture from rising into the attic space, reducing the risk of mold growth. In addition to vapor barriers, sealing leaks is critical. Warm air from the living space often seeps into the attic. This can occur around plumbing vents, electrical fixtures, or small gaps in the attic structure. To ensure an airtight seal, inspect these areas and apply caulk or weatherstripping where needed. Addressing leaks can dramatically lower humidity levels in the attic, promoting a healthier and more energy-efficient environment. When managing attic humidity, consider the following strategies: Install Vapor Barriers : Use plastic or foil sheets to block moisture. Seal Air Leaks : Inspect and seal gaps around fixtures and vents. Insulation Overhaul : Update insulation to include moisture-resistant materials. By integrating vapor barriers and sealing leaks into your moisture control strategy, you can effectively manage attic humidity levels. This proactive approach aids in preventing costly mold remediation and structural repairs down the line. Impact of Attic Conditions on HVAC Systems Attic conditions significantly impact HVAC system performance. High attic humidity can strain these systems, leading to inefficiencies. Poor insulation and ventilation exacerbate this issue, causing systems to work harder. Increased humidity can lead to HVAC components deteriorating faster. Moisture promotes rust and electrical issues in vital parts. This shortens system lifespan, leading to more frequent repairs and replacements. Proper attic insulation and humidity control can alleviate these problems. By stabilizing attic conditions, HVAC systems operate more efficiently. This leads to less wear and tear, thus reducing maintenance costs and extending equipment life. Energy Consumption and System Efficiency When attic conditions are optimal, energy consumption decreases. Lower humidity helps HVAC systems run smoothly, conserving energy. Conversely, high humidity forces systems to consume more energy, increasing utility bills. Efficient HVAC operation also depends on how well attic insulation is maintained. Proper insulation keeps warm, moist air from affecting HVAC performance. This enhances the system’s ability to regulate indoor temperatures effectively. To optimize energy efficiency, consider these points: Upgrade Insulation : Ensure it meets or exceeds current standards. Maintain Proper Humidity : Use dehumidifiers to keep moisture levels balanced. Regular HVAC Maintenance : Inspect for wear and potential moisture damage. By addressing these factors, you can boost energy savings and improve HVAC performance. This ensures better indoor comfort and extends the lifespan of heating and cooling systems. Mold Remediation in Attics Mold in attics is a common concern that requires urgent attention. High relative humidity creates favorable conditions for mold growth. This can lead to potential health risks and structural damage. Addressing mold effectively involves more than just surface cleaning. It is crucial to identify and eliminate the root causes, such as moisture intrusion. Proper ventilation and attic insulation are essential in preventing mold. Professional mold remediation is often necessary for thorough treatment. Experts can assess the situation, remove affected materials, and implement long-term prevention strategies. This ensures that mold issues are resolved efficiently and comprehensively. Identifying and Addressing Mold Issues Identifying mold early can save significant costs and health risks. Look for visible signs such as discoloration and musty odors. These indicators suggest that further investigation is needed. Moisture is the main cause behind mold problems. Thus, addressing it requires a targeted approach. Here are actionable steps: Inspect for Leaks : Check roofing and plumbing for any signs of leaks. Evaluate Humidity Levels : Use hygrometers to monitor and adjust moisture levels. Enhance Ventilation : Ensure that attic ventilation meets the necessary standards. Once mold is identified, it's vital to address it swiftly. Remove and dispose of contaminated materials safely. Proper cleaning of affected areas prevents mold from recurring. Implementing these strategies can safeguard your attic from future mold problems. Monitoring and Maintenance for Optimal Humidity Levels Maintaining ideal humidity levels in your attic is crucial for avoiding mold and structural issues. Consistent monitoring allows for early detection of problems. Employing regular maintenance practices ensures long-term efficiency. Proactive measures in the attic can prevent high humidity from causing significant damage. This involves a combination of technology and manual inspections. Together, these approaches help maintain an optimal environment. Implementing a comprehensive maintenance plan is essential. Focusing on effective monitoring tools and preventive measures can lead to reduced energy consumption. Ultimately, this enhances the longevity of the building. Tools and Techniques for Humidity Monitoring Several tools are available to keep tabs on attic humidity. Digital hygrometers are highly effective in providing precise readings. These devices can be placed in various attic locations to track moisture levels. Homeowners and professionals can also consider smart sensors. These devices provide continuous monitoring and can be integrated into home automation systems. Alerts can be set up to notify you if humidity levels exceed desired thresholds. Leverage these tools to stay informed about attic conditions: Digital Hygrometers : Easy to use and display current humidity levels. Smart Sensors : Offer remote access and alerts for better control. Thermal Imaging Cameras : Identify moisture areas visually. Using the right tools helps maintain suitable conditions in the attic year-round. Regular Inspections and Preventative Measures Routine inspections are necessary to maintain an attic's health. Regular checks can pinpoint ventilation problems or insulation issues. Addressing these promptly prevents bigger complications like mold growth. Attic care involves more than just monitoring. Effective preventative measures should be part of your maintenance routine. Key areas to focus on include sealing leaks and ensuring insulation is intact. Develop a habit of performing these checks and actions: Inspect Insulation : Verify if it's dry and properly installed. Check for Leaks : Examine the roof and attic floor for water signs. Clear Ventilation Paths : Ensure vents are unobstructed for optimum airflow. Commit to regular inspections and adopt these measures. They will protect your attic and support the building's integrity over time. Conclusion: The Balance of Insulation and Ventilation Achieving the right balance of insulation and ventilation is fundamental for controlling attic humidity. Proper insulation reduces heat transfer while effective ventilation manages moisture levels. Together, these elements form the cornerstone of attic health. By understanding and applying thermal dynamics, building professionals can significantly enhance energy efficiency. This balance not only protects against mold and structural problems but also extends the life of HVAC systems. Through continuous learning and application of best practices, both building contractors and HVAC technicians can ensure optimal attic conditions, leading to improved comfort and sustainability in residential and commercial spaces.